
Introduction to Combing
Combed top is a fiber preparation most often seen in those luscious braids we spinners love so much. This fiber preparation is marked by having all the fibers perfectly parallel to each other, and is ideal for worsted-style spinning—although you don’t have to spin it that way! Combed top can also be prepared by hand, and we’ve collected Spin Off’s best combing articles, videos, ebooks, and more on this topic page.
When it comes to combing fiber, even experienced spinners can get a little apprehensive. Those tines are sharp, and can be dangerous when wielded incorrectly! But with a little practice—and an up-to-date tetanus shot—combing can be a rewarding way to process your fiber.
Whether you are combing from fleece you’ve raised, shorn, and scoured yourself, you like to comb commercial top for interesting color blends, or somewhere in between, these posts have everything you need to know!
Getting Started
- For the absolute beginner who wants to start right away, discover A Versatile and Inexpensive Fiber Tool: The Dog Comb.
- If you're ready to venture into wool combs but don’t want big, heavy combs, try Spinning Basics: Minicombs, which will teach you good form for using any wool comb.

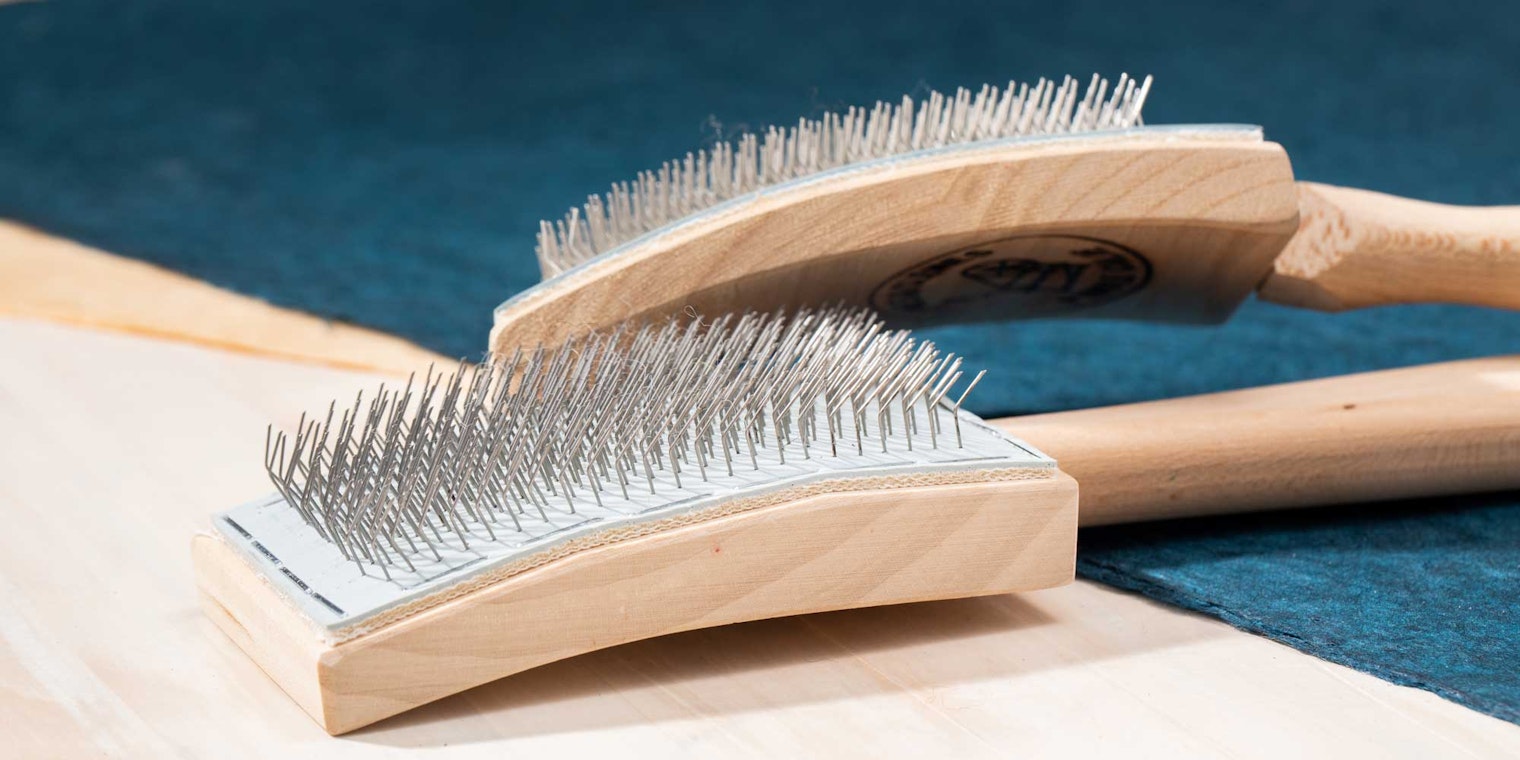
A two-pitch set of minicombs is a great introduction to hand combing fiber. Photo by Matt Graves

A hackle offers more capacity and interesting design opportunities. Photo by Suzy Brown
Explore More
- A hackle offers interesting opportunities for color blending, while maintaining the smooth structure of your combed top. Try Blending Color on a Hackle.
- Want to dive deeper? Find a collection of articles and tutorials in Combing: A Spinner's Guide eBook.
Watch How It's Done
In Combing Fiber, expert instructor Robin Russo covers combing basics and much, much more.
- You'll see a wide range of tools in action, from simple pet combs to hand-held Viking combs, to Russian paddle combs, to classic English combs.
- You'll learn that combing is perfect for cleaning out guard hairs and debris, for blending fibers of similar length, and for true worsted spinning.
- You'll see how different combs are appropriate for different fibers, and how to choose the kind that's best for you.
- You'll learn important guidelines for safety and for equipment care and maintenance.

Wool combs are the perfect tool for a worsted preparation. Photo by Matt Graves
Browse more combing articles and favorite resources from Spin Off below!
The Ins & Outs of Diz Design
Does it matter which way your diz faces? Do you need more than one? Discover diz best practices with real-life examples to help you improve your fiber-prep experience.
By Kim McKenna
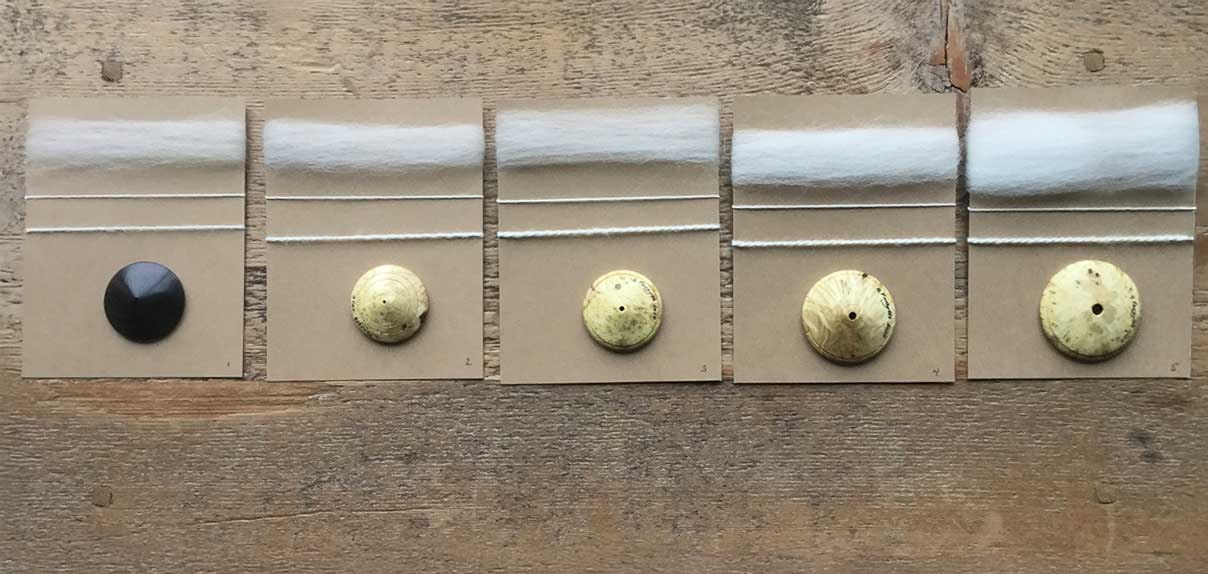
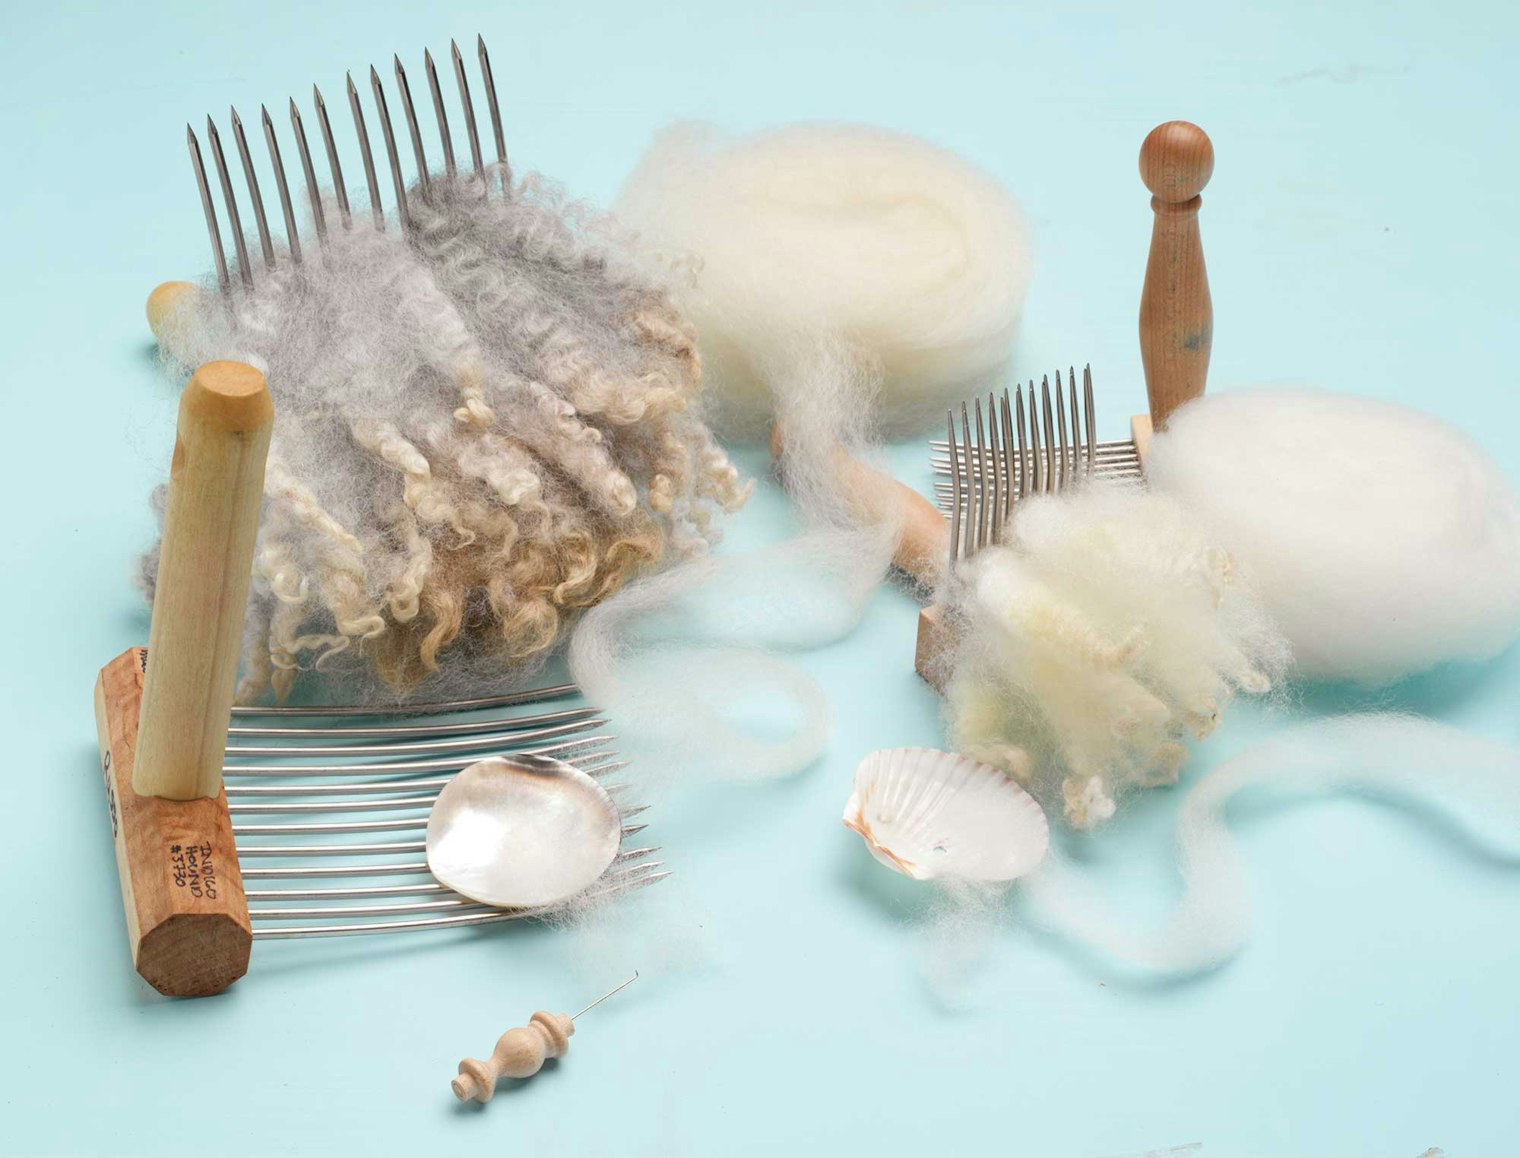
A diz is a tool used to help remove a length of fiber, called a sliver, from your wool combs or a hackle. A button, a sewing-machine bobbin, the rounded corner cut from a milk jug, a shell, a piece of wood, or anything else with a hole in it could be used as a diz. Any of these items can be used to create a tape of fiber to spin from. However, if you are planning to do a significant amount of combing and dizzing, it is nice to work with a well-designed tool that is efficient and not cumbersome and one that helps you work at a relatively swift pace. As I will explain, the design of a diz not only affects the ease of executing the task of dizzing fiber, it can also change the character of the resultant sliver and, in turn, the end product—your yarn.
The Elements of a Diz
The five dizzes I use have the following features in common: They are all lightweight and no larger than 2 inches in diameter. They have a smooth, centered orifice that’s hollowed out into a concave or bowl shape. A diz with these features makes it easier to create a uniform sliver—one that is consistent in fiber density and that has very few thick and thin spots.
The curvature of the diz affects the density of the sliver pulled from the combs. The higher the curvature, the denser the sliver.
To help the diz glide along the sliver as you work, the design should include a smooth orifice. To reduce resistance even further, the material around the lip of the orifice should thin out so the fiber works through a shallow, as opposed to a deep, channel.
 Note the different degree of curvature of the dizzes.
The Benefit of Variety
I regularly use five dizzes. Why five? Each of the dizzes has a different size of orifice. In knitting-needle gauge terms, the orifice sizes are 5.0 mm, 3.25 mm, 2.25 mm. 1.5 mm, and smaller than 1.5 mm. I select a larger size for the first pass, and for the second dizzing (see “Wool Combing & the Importance of Planking,” Spin Off Fall 2020, the one I choose depends upon the diameter of yarn I want to spin. The finer the yarn, the smaller the orifice.
 The left diz’s bottom orifice, the middle diz’s top orifice, and the orifice of the diz on the right are all 1.5 mm. The differences in the sliver correlate to the degree of the curvature. The higher the curvature, the denser the sliver.
Why Weight and Balance Matter
A diz that is lightweight and not too broad negates the need for me to use one hand to support the diz as I pull the fiber into a sliver. Having both hands working in unison makes the action of dizzing smooth, effortless, and quite quick—see Kate Larson’s web post and how-to video, “Diz Tips: The Finer Points of Wool Combing" for more.
Although my dizzes are round with one centered orifice, any shape with any number of orifices can work so long as the diz is nicely balanced during dizzing. If the orifice is off center and heavier to one side, it can flop downward while you work, necessitating one hand being relegated to the job of supporting the diz to counter the extra weight pulling down on and thinning out the sliver. Not only will this slow you down, it will also be more challenging to diz off a nice, even fiber preparation.
Which Direction Should the Diz Face?
I work with the concave surface, the inward curve, of the diz facing the combs. When dizzing in this manner, there is less resistance; the dizzing action is smooth; it is easy on the hands, requiring only a gentle pull to draft the fiber; and it results in a less dense sliver. If you use the same diz and orifice with the convex surface, the outward curve, facing the combs, you will feel resistance as you push the diz toward the combs. To me it feels like I am going “against the grain.” The diz will not glide along the sliver as smoothly, and the sliver produced is slightly denser. It is also harder on the hands because it requires a firmer tug to draft out the tape of fiber.
Also, which face of the diz you have pointed toward the combs when dizzing affects the character of the sliver. When I position the diz so that the inward curve faces the combs, it results in a less dense fiber preparation and one that spins into an airy, lighter-weight yarn. When I diz with the outward curve facing the combs, it results in a denser sliver and a slightly more compact yarn. Once spun, both slivers may result in yarns that are very close in grist, but the hand and density are notably different.
 Left: Inward curve facing the combs. Right: Outward curve facing the combs.
The differences mentioned here are most noticeable when working with a diz with a very small orifice. When writing this article, I wanted to find a way to confirm what my eyes and hands knew to be true. So, I decided to measure the handspun from each sliver preparation with a McMorran Balance. The handspun from the sliver made with the concave surface (inward curve) of the diz facing the combs measured 2,300 yards per pound (ypp). The handspun from the sliver made with the convex surface (outward curve) facing the combs measured 1,700 ypp.
 Left: Slivers made using the same orifice from both the concave and convex surfaces. The sliver on the left was dizzed with the concave surface, inner curve, facing the combs. The sliver on the right was dizzed from the combs with the convex surface, outer curve, facing the combs. Right: Kim decided to measure the two yarns with a yarn balance. The yarn spun from the sliver made with the inward curve of the diz facing the combs measured 2,300 ypp (top) and the yarn spun from the sliver the sliver made with the outward curve facing the combs measured 1,700 ypp (bottom).
How to Select Your First Diz
My advice for anyone who wants a diz that is efficient and easy to work with is to choose a lightweight, well-balanced diz with a concave/bowl-shape. Make sure it is of a manageable diameter, not too big or too small, for your hands. It should be both comfortable to hold and to maneuver. As for the orifice? The lip should be thin and smooth and the channel shallow. Each yarn in first image at the beginning of this article was spun using the same ratio and draft length. The difference in grist/diameter is simply a function of my choice of orifice size. So, when you choose a diz, don’t forget to take into account the diameter of yarn you want to spin.
Happy Dizzing!
Resources
- Find Kim's article, “Wool Combing & the Importance of Planking,” in the Fall 2020Spin Off issue.
- Watch Kate Larson's how-to video in “Diz Tips: The Finer Points of Wool Combing.”
Originally published January 1, 2021, updated September 3, 2025.
A Versatile and Inexpensive Fiber Tool: The Dog Comb
Learn how an ordinary dog comb helps with fiber prep, then add one to your spinner’s toolbox!
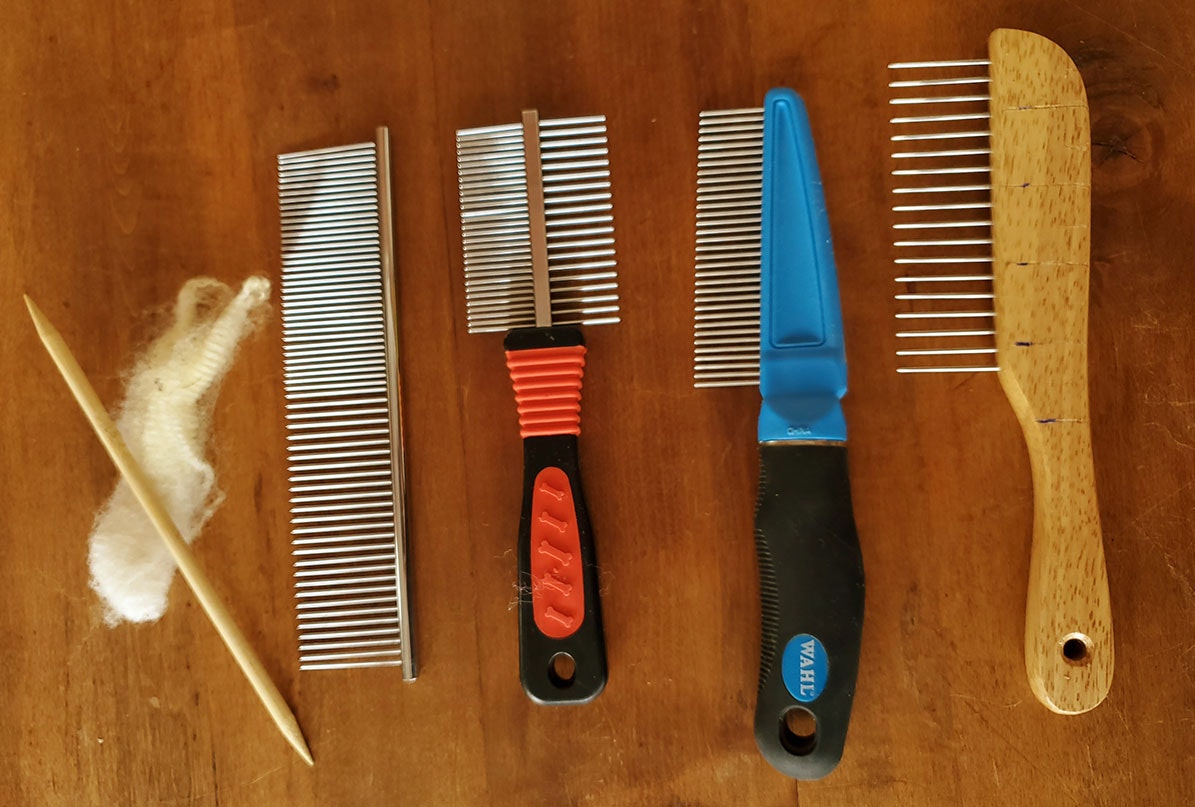
Some fiber-prep tasks can be tricky, time consuming, and frustrating. In my daily work with fibers, I look for innovative spinning and wool-preparation tools to improve efficiency and comfort without losing pleasure. One of my favorite tools is an inexpensive dog comb because I can use it for several different steps when preparing fiber.
Types of Dog Combs
Dog combs come in different sizes and types. You could use one that you have close at hand; however, a medium-size, all-propose dog comb with two sets of teeth, one set with the tines spaced closer together and one with them spaced farther apart, works the best for my needs. I find combs with very fine teeth to be inefficient and ones that have widely spaced teeth don‘t open fibers as well but are helpful for pre-wash preparation (more on this in a moment).
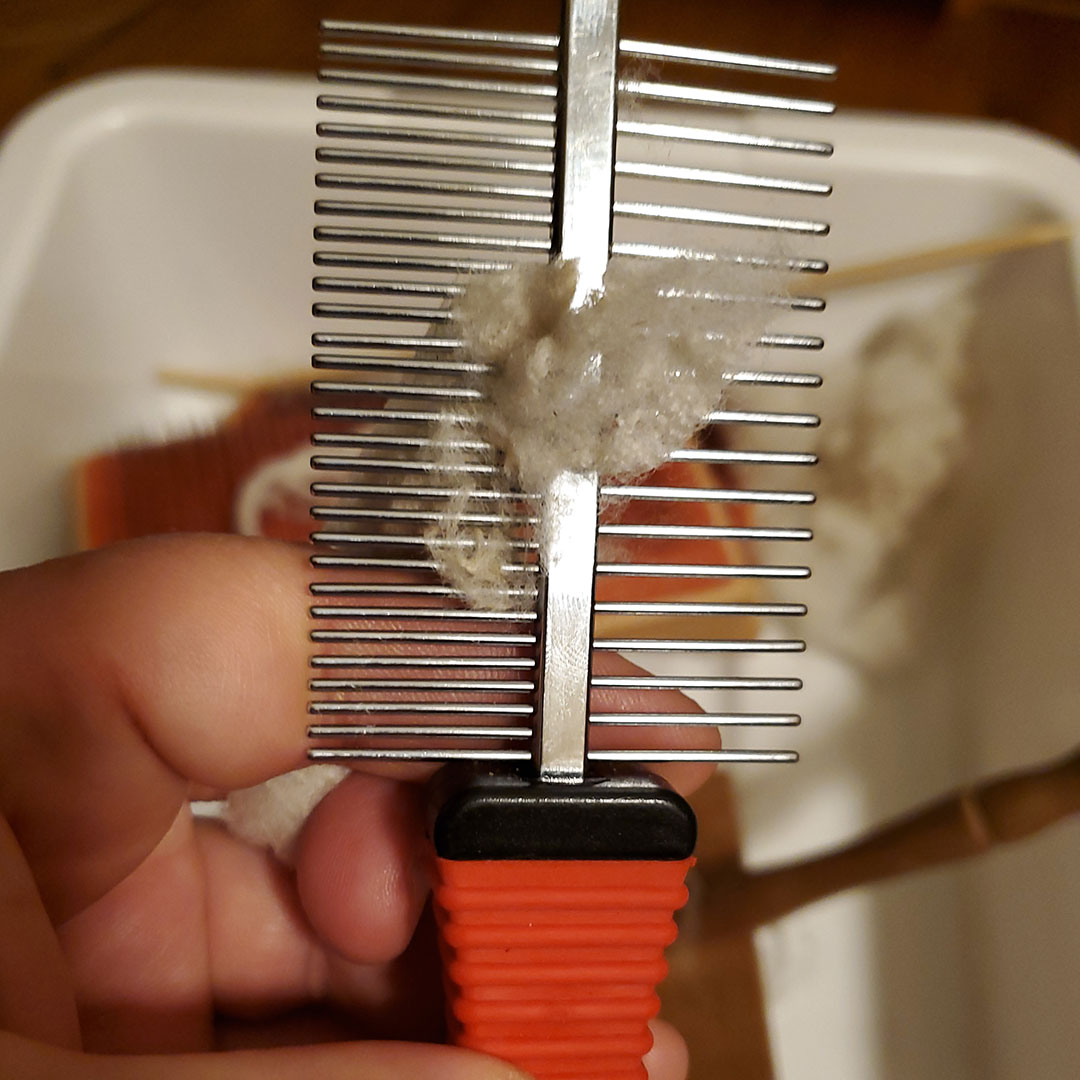
Marcelo‘s favorite dog comb has two sets of teeth.
Here are four ways I use dog combs to help me with my spinning prep.
1. Measuring Fibers
Marking helpful measurements, such as inches or centimeters, on the body of the comb helps me quickly sort longer fibers from shorter ones and measure my wool. I use a permanent marker for noting the increments on the body of the comb or adhere small pieces of removable tape for a more temporary notation.
2. Opening Locks
A wide-toothed comb helps open dirty lock tips for a better wash. Any comb with a single row of metal teeth with round-ended tines does this task well. To open clean fleeces, a comb with two different teeth spacings is ideal. I use the side with closer spaced teeth to open the tips of the locks and the other side to open the lock’s cut end.
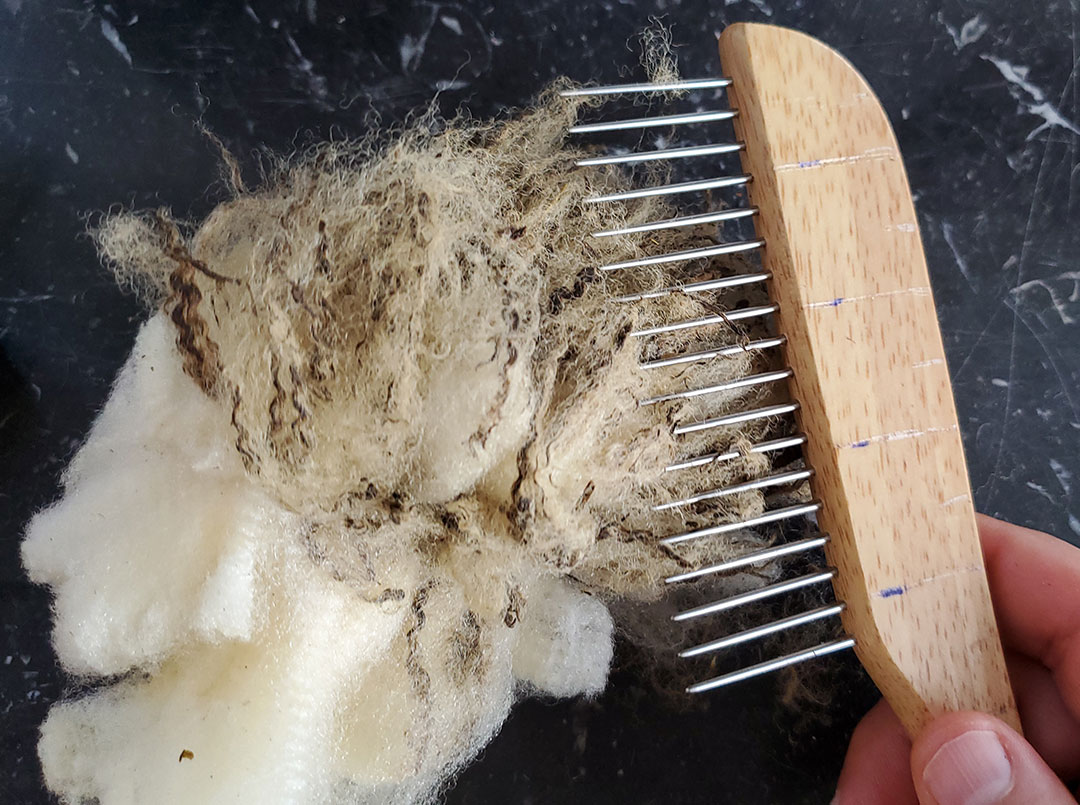
Marcelo opens unwashed locks with a dog comb that has tines that are set farther apart.
3. Combing Fibers
If you don‘t have a proper set of hand combs, you can use a dog comb to prepare small amounts of fiber. It might take longer, but it works well for medium- to long-stapled wool. I use a clamp to secure the dog comb to a board or table, and with my hands, I pass the fiber between the comb’s teeth, aligning the fibers. When I have enough combed fiber, I spin the fiber directly or diz it to make top. This preparation produces a smooth, lustrous, semi-worsted yarn.
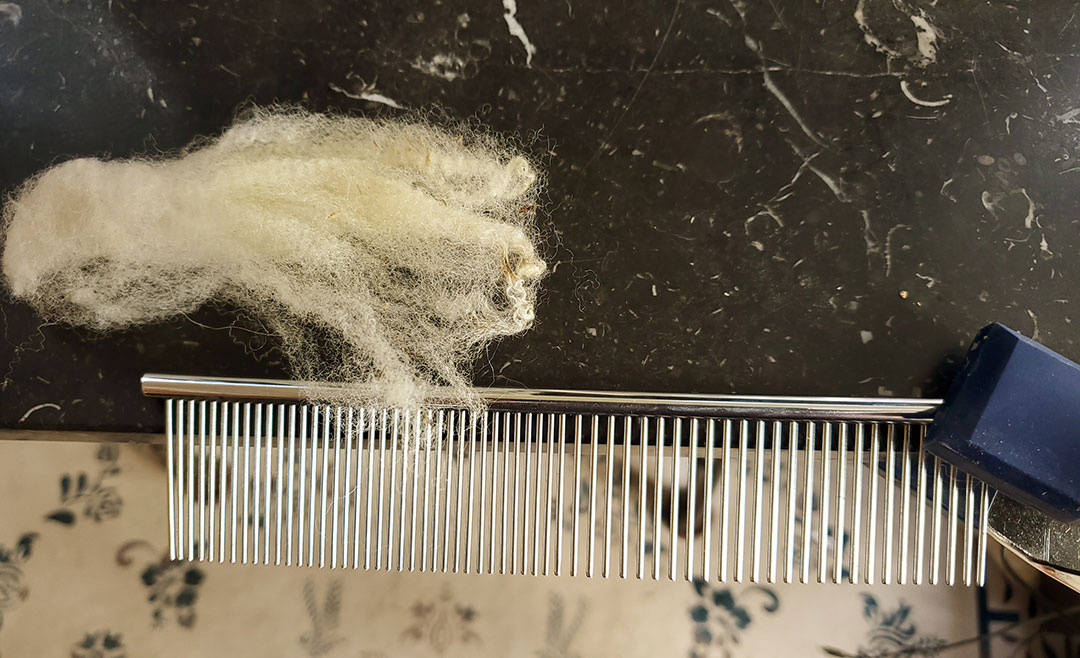
Marcelo often clamps his dog comb to a surface, such as a table, so that both hands are free to work with the fibers.
4. Mixing Fibers and Colors
The dog comb is a great tool for making quick samples and tests of fiber and color blends. I work in the same manner as described above in #3 but layer different fibers and colors on the dog comb as I work.
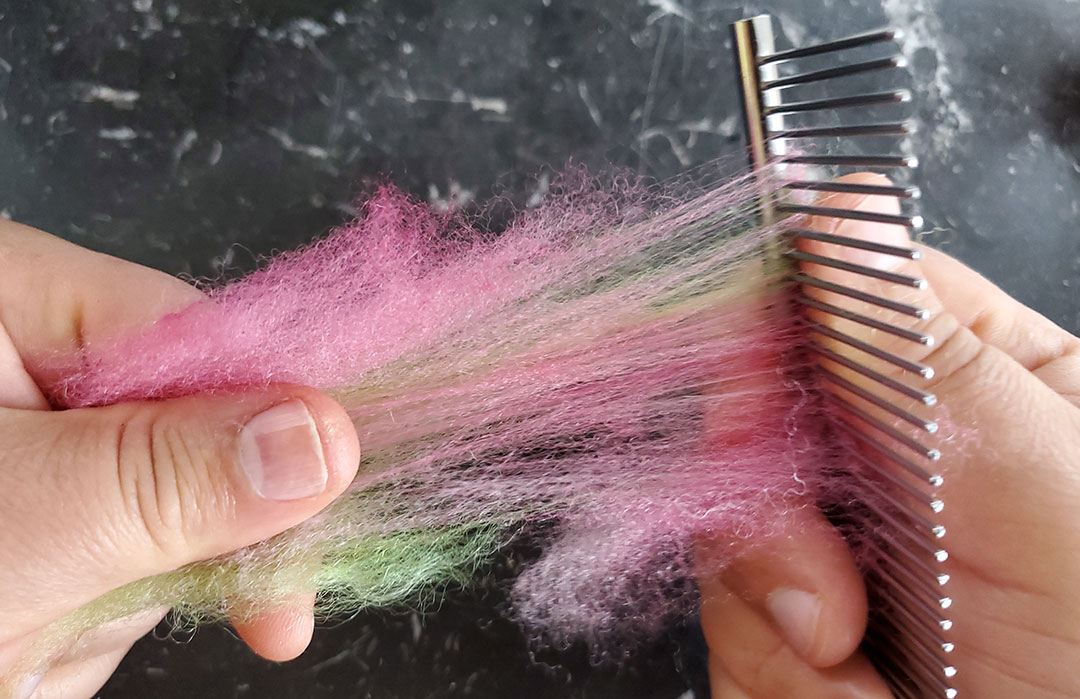
Make quick samples of fiber and color blends with the versatile dog comb.
A dog comb is a great addition to every spinner’s toolbox. This simple, inexpensive, and multipurpose device can become a favorite fiber-preparation tool.
Passionate about fiber and curious by nature, Marcelo R. Martins decided to take his craft to the next level by enrolling in a master spinner program. He spins, knits, and shares his passion and knowledge of fibers through a blog and live presentations on his YouTube channel, MakelooStudio. He advocates the importance of forging links among artisans, local producers, and the environment.
Combing Wool: Static Control
Spritzing a lubricant onto your locks of wool will make combing easier. Here are three recipes to try.
By Debbie Blair
The process of combing wool creates static that can make the fibers uncontrollable. In order to combat static and tame frizz, the wool needs to be lubricated. Traditionally that is done either with olive oil or with an emulsion of water and oil sprayed from a bottle. Spin Off has covered various wool lubricants throughout the years and recently shared tips from several well-known spinning gurus.
A few of our readers happily shared their own recipes for combing and carding solutions. We hope you find them to be helpful as you embark on your combing or carding practice.
 David Harron uses a combination of olive oil soap and water, which easily washes out of yarn. Background photo by Kelly Sikkema on Unsplash
 Jeannie Sanke combines distilled water with other ingredients, including lavender essence. Background photo by Kelly Sikkema on Unsplash
 Robin Russo’s mixture is removed once she washes her spun skeins. Background photo by Annie Spratt on Unsplash
A big “thank you” to our readers who sent in their recipes.
Do you have a recipe you’d like to share? Send it to us via our email address.
Further reading:
- “Flicking and Combing Painted Locks”
- “Diz Tips: The Finer Points of Wool Combing”
- “Odd Handspinning Terms: Carding & Combing Edition”
- “A Versatile and Inexpensive Fiber Tool: The Dog Comb”
- “Five Good Reasons to Buy and Use Mini Wool Combs”
- Combing Fiber with Robin Russo Video Download
PS: Here’s an easy way to save the recipes for future use. Just copy and paste the text below!
Olive oil soap for preventing static, by David Herron
- about 1 tsp pure olive oil soap (shaved off of a bar)
- 1 cup of water
- Mix together until soap and water “melt together.”
- Pour into a spray bottle.
- Shake bottle, then apply sparingly to wool.
Notes:
I use Savon de Marseille soap from France.
This recipe is an offshoot from The Alden Amos Big Book of Handspinning.
Also good for making felt and it washes out easily from yarn or weavings.
Lavender essence mixture, by Jeannie Sanke
- Distilled water
- Isopropyl alcohol
- Food-grade mineral oil
- Lavender essence
- Mix equal parts of the first 3 ingredients in a spray bottle.
- Add 1–2 drops of lavender essence to the bottle.
Notes:
I typically spin fiber from alpacas and dogs, neither of which have ever had lanolin and both of which are extremely fine and prone to static charge.
Solution never gums up the fiber no matter how long the batt or rolag waits.
Combing oil recipe, by Robin Russo
- 1 ounce rubbing alcohol
- 2 lecithin capsules
- 3 ounces water
- 4 ounces olive oil or other vegetable oil
Mix all ingredients in a fine spritzer; shake before using.
Notes:
I comb one evening and spin the next and continue until I’m ready to use the wool in a project.
I wash yarns after spinning as part of finishing the skein, and the combing oil is removed at that stage. Even if fiber sits around for a while before it is washed, it will not become tacky (stiff and sticky) the way it does before lanolin is removed.
Debbie Blair is the associate editor of Spin Off magazine. A lifelong crafter and avid reader, she finds her happy place reading and relaxing next to a mountain stream.
Combing Wool with Milk (yes, it’s a thing)
Among the things that make it easier to comb wool are starting with well-scoured locks and adding a lubricant. Find a recipe to make your own!
By Anne Merrow
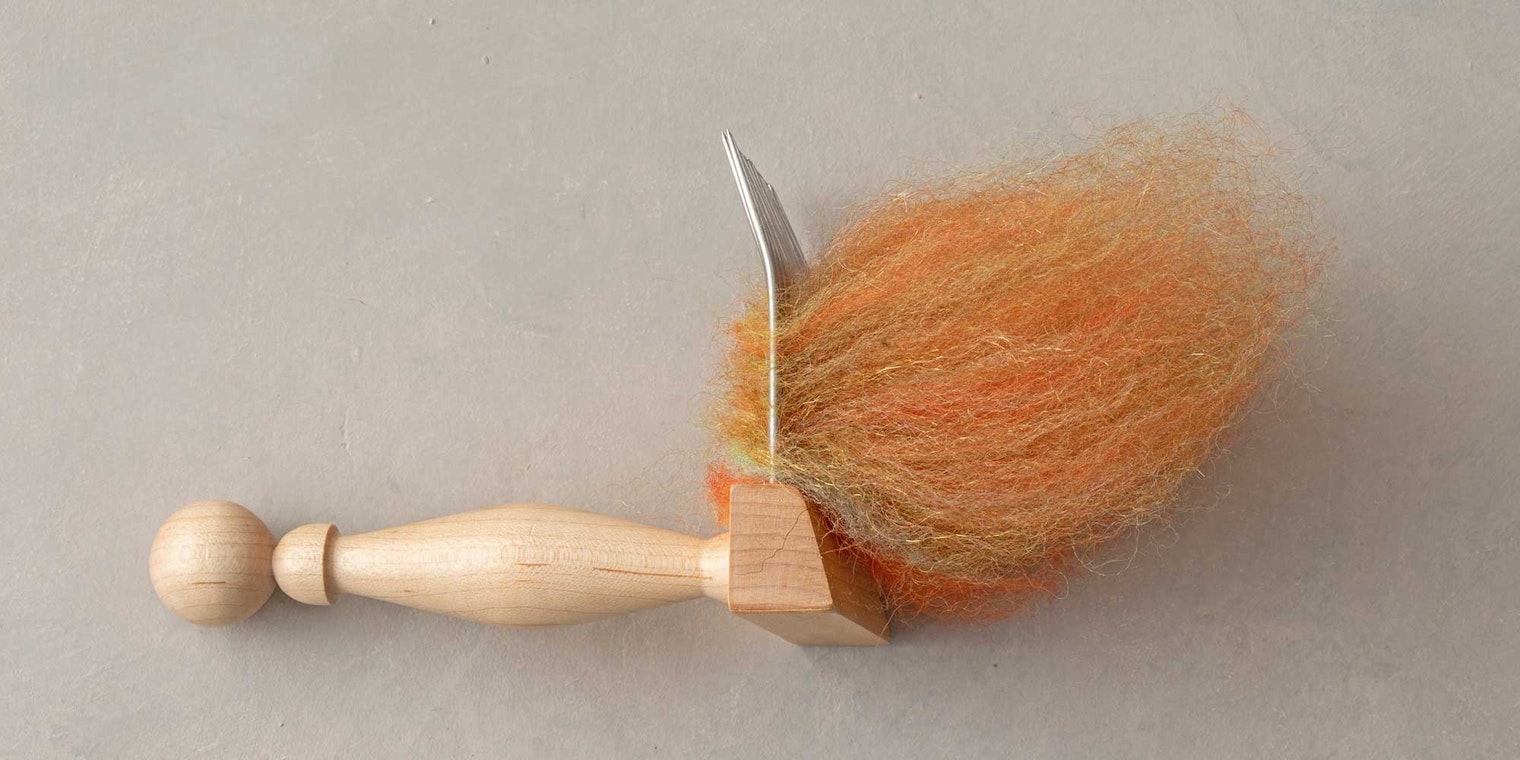
A while back, I mentioned to a coworker, “We have a huge hole in our coverage. We’ve never published anything on combing milk.” She looked at me like I was crazy and said, “Milk?” Yes—the elixir that spinners use when combing wool to combat static and tame frizz. Combing milk.
I scoured our indexes and The Alden Amos Big Book of Handspinning and could not find a single entry for that phrase, although I’ve heard it several times. Alden mentions that wool needs to be lubricated for combing, either traditionally with olive oil or with an emulsion of water and oil sprayed from a bottle. I searched a bit further and learned that, in fact, Spin Off has covered various wool lubricants throughout the years, just not anything called “combing milk.”
Here’s a partial rundown:
Robin Russo’s Recipe
Combing maven Robin Russo calls her wool lubricant “combing oil” in her article in Spin Off Summer 2004.
 Robin Russo keeps a spray bottle handy when combing wool.
It would be very frustrating and counterproductive to try to comb fibers without moisture. The static created during combing makes fibers uncontrollable. You can spritz fibers with water or olive oil, or you can use a combing oil that combines oil and water. Although I no longer remember the origin of the following recipe, I find it works very well.
1 ounce rubbing alcohol
2 lecithin capsules
3 ounces water
4 ounces olive oil or other vegetable oil
I keep this liquid in a fine spritzer and shake it before using. It may not feel right to put oil back on wool because you go to great lengths to remove lanolin, but oil is necessary to control the static. I do not comb fibers and set them aside to be spun at a later date. I comb one evening and spin the next and continue in that manner until I am ready to use the wool in a project.
I always wash yarns after spinning as part of finishing the skein, and the combing oil is removed at that stage. Even if fiber sits around for a while before it is washed, it will not become tacky (stiff and sticky) the way it does before lanolin is removed.
Advice from Spinning Gurus
In a “round-table discussion” in Spin Off Summer 1991, coordinator Rita Buchanan posed the following question:
Peter Teal, author of Hand Woolcombing and Spinning, recommends treating wool with a mixture of olive oil and water before combing it in order to reduce static and friction. Do you do that?
Priscilla Gibson-Roberts:
I have. I’ve tried everything, but I don’t like adding something that I just have to clean out again. Now I just use warm water to control static. I try not to strip out all the grease when I wash a fleece, even though sometimes it gets sticky again and I have to rewash it. I try to only clean what I’m going to use in six weeks or so. That way I can take advantage of the natural oils. I don’t like to work with real dry wool, or to re-oil dry wool.
Lee Raven:
I’ve tried everything, too, but don’t use any treatment now. I’m afraid that oil or other additives might make a gummy build-up on the tines that I’d have to clean off later. I’m very pleased with the results I get by combing wool that’s perfectly clean but still slightly damp. I comb the wool within a few hours of washing it.
Sharron Reese:
I do use oil. I weigh the wool and use the formulas given in Teal’s book. I want each batch to handle the same. The olive oil can get tacky if you let the combed wool sit too long; if that happens, I put the wool (in a plastic bag) near the heat vent and it loosens up again. Usually I don’t comb more than I’ll spin in a week or so.
Opinions vary on using water, oil, or a combination to control the static. Shown here is a set of English combs.
Paula Shull:
I don’t add oil. Sometimes I mix ¼ cup of fabric softener per quart of water in a spray bottle, and spray a real fine mist up in the air and let it fall like rain on the fibers. This works to control static on silk and Merino.
Bill Benham:
If the humidity is low, I use plain water to control static. I’m planning to do some experimenting with machinist’s cutting oil. I know it’s safe to work with, and I think it might improve the handling.
Iris Dozer:
It’s always dry here, and static is a problem, so I’ve run the gamut of oils and treatments. What’s important is to pay attention to the fleece, and to know why you’re doing what you’re doing. Sometimes there’s enough oil left in the fleece after washing that it’s just right to work with. I’ve used olive oil and other oils, and I tried an after-shampoo hair conditioner that’s marketed to African-Americans—it works great and smells good, but it’s expensive. Now I use a Shell product called Dromus B.—it’s a diamond-cutter’s oil that's water-soluble. It works fine, but to get any, I had to buy a five-gallon drum, so now I have a lifetime supply.
Patricia Emerick:
Static isn’t much of a problem here, but if I’m working with very fine wool, I might use a drop of oil per lock. Usually, I just spritz with water.
 Noel uses Viking combs (shown here) without a diz, instead choosing to judge the diameter of the fiber by sight and by touch. Photo by Joe Coca
Noel Thurner:
A spritzing with water works for me, too. Sometimes I use a technique I learned in Scandinavia: I wrap the wool in a warm, damp towel for half an hour or so. The warmth softens the fibers, especially the coarser guard hairs, and makes them behave better. Also, the warmth softens whatever natural oils are left in the fibers after a gentle washing.
Norman Kennedy’s Solution
And lest you think it’s only for combing wool, Norman Kennedy always brings a bottle of baby oil when he cards wool. In his video From Wool to Waulking, Norman tells the (slightly terrifying) story of all the lubricants he’s used when carding wool.
Do you have a go-to method for carding wool? Tell us about it by sending us an email here.
And remember that if you are an active subscriber to Spin Off magazine, you have unlimited access to previous issues, including those mentioned here. See our help center for the step-by-step process on how to access them.
Anne Merrow is editorial director and a co-founder of Long Thread Media.
Originally published October 4, 2017; updated May 15, 2024.
Odd Handspinning Terms: Carding & Combing Edition
We’re back with another batch of odd handspinning terms—some you’ll know and others may surprise you! Let’s explore carding and combing wool.
We’re back with another batch of odd handspinning terms—some you’ll know and some that may surprise you! In her article “Wonderful Worsted” from Spin Off Summer 1983, Iris Dozer gives a list of words related to carding and combing wool.
Odd Handspinning Terms: A Worsted Vocabulary
Backings: longer fibers left on the back of the combs after drafting
Butt end: the clipped end of the lock of wool
Combing wool: industry: fibers of wool 1½" to 6" in length used in worsted spinning; craft: fibers of wool 4" to 10" long used for handcombing
Combs: a device used to disentangle, straighten and separate fibers
Crimp: natural curl in wool fiber. Crimp gives wool its natural resilience and elasticity
Donn: the act of placing fibers onto a comb in preparation for straightening
Doff: to pull of the fibers in an orderly fashion
Finger: small length of slivers (3'–4')
Finger Draft: draft against the twist. Twist is confined to the yarn below the lower hand or hand closest to twisting mechanism while drafting
Hackle: wool hackles have a two-row set of tines that can be used to separate wool fibers much like a comb
Jigging: the process of combing the wool
Lock: a small individual grouping of fibers that seem to cling together when shorn from the sheep
 Locks of fiber are added to the handcard. Photo by Matt Graves
Luster: a natural gloss or sheen characteristic of some wools and mohair. Three characteristics types: silver luster found in Merino; silk luster found in English crossbred-longwool breeds; and glass luster found in mohair and other goat hairs
Lustre: same as luster
Milkings: longer fibers left on the front of the combs after doffing
Noils: short wool fibers left on the combs after doffing
Pad: a wooden or metal structure that holds the wool combs in place
Roving: a twisted sliver or roll of wool, also called a rove
Sliver: a continuous strand of parallel wool fibers with no twist applied
Spindle draft: drafting done against the wheel
Staple: the length of a lock of shorn wool
Top: a continuous untwisted strand of combed wool fibers made into a convenient package. Industry uses the sliver form wound into a ball of at least 1" in diameter
Woolen: short staple fibers, irregular in length and arrangement characterized by the adjectives soft, fuzzy, warm, bulky, stretchy
Worsted: long staple fibers regular in length, highly parallel in arrangement and spun into yarns characterized by the adjectives hard, smooth, cool, strong, lustrous
How many of these handspinning terms did you know?
Find more tips for using handcards here.
And learn more about combs here.
This article was excerpted from Spin Off Summer 1983. To read the full article, download the issue here.
Also, remember that if you are an active subscriber to Spin Off magazine, you have unlimited access to previous issues, including Summer 1983. See our help center for the step-by-step process on how to access them.
Originally published December 13, 2018; updated August 9, 2023.
Trouble Spinning Across the (Combed) Top? Heavenly Bresser Has Top Tips For You
We often know about spinning across the top but seeing it done well can make it easier to put it into practice.
By Kate Larson
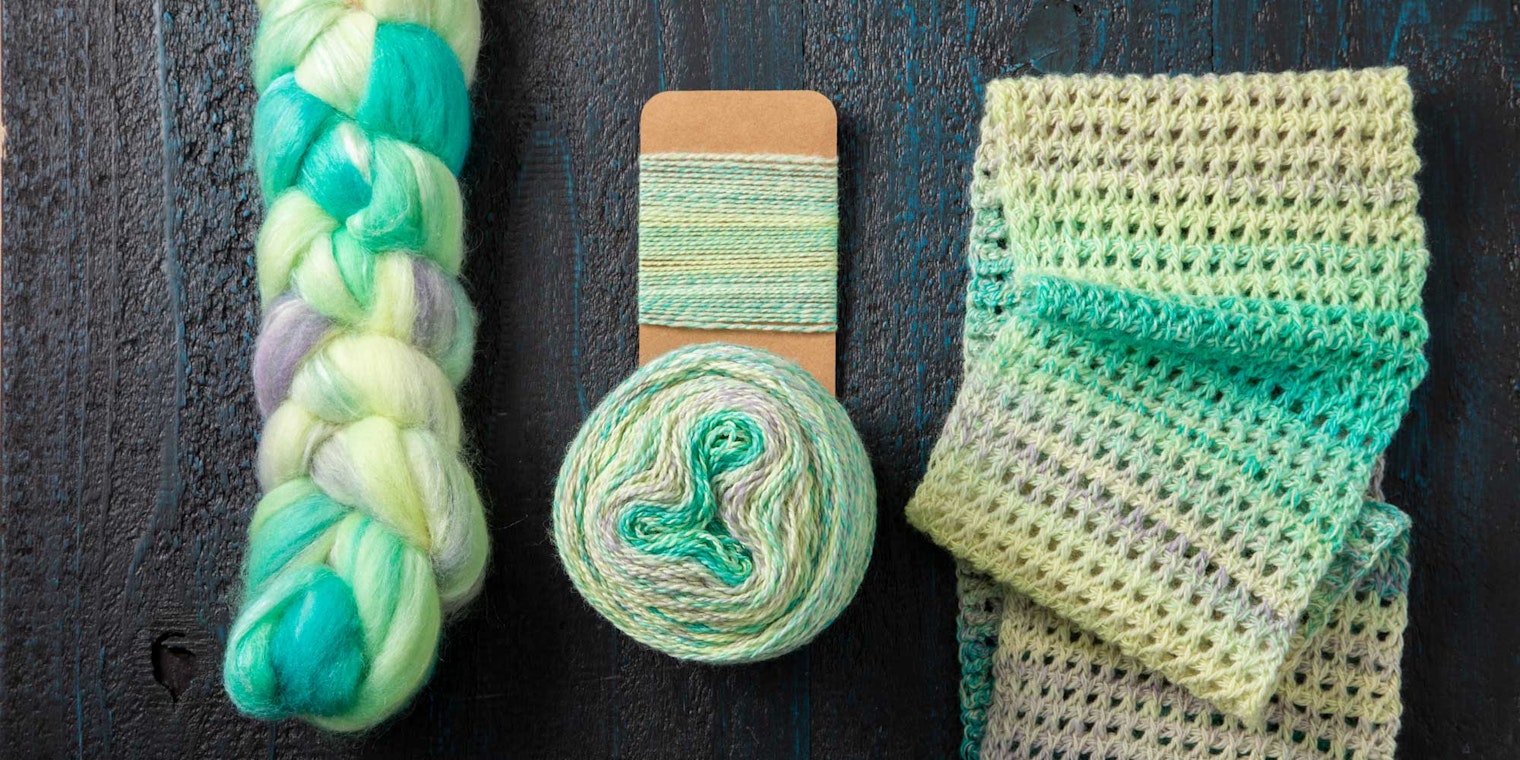
In her new video, Spinning Fractal Yarns, Heavenly Bresser teaches us how to use handpainted combed tops and hand-prepped batts to create handspun that is rich in complex stripes and color interactions. I was excited to see that Heavenly begins the spinning section of her course with a great demo and discussion about “spinning across the top.” This technique is one of those things that we often know about, but until we see someone do it well, it can be hard to put into practice.
What we call “spinning across the top” or “spinning on the tips” is simply working back and forth in a zigzag when drafting and spinning so that the full width of the fiber is spun evenly. This is important when spinning a handpainted combed top because it typically means that all of one color will be spun before shifting to the next. It really is one of those things that is easier to demonstrate than explain! So, Heavenly’s excellent lesson on this technique is one of our top tips to share with you from her fab new course.
 Handpainted tops typically change color along their length. Spinning across the tips helps you use up all of one color before shifting to the next. Photo from Spinning Fractal Yarns video workshop
Spinning Across the Tip of Your Tops
Heavenly describes spinning across the top here, but if you’ve struggled with this technique, I also urge you to carefully watch how she manipulates the fiber, too. Here are a few things she shares:
Drafting Technique: Short-Forward
This drafting method is often called a worsted draw or short-forward. You’ll see that Heavenly’s forward hand pinches the point at which the twist meets the fiber, preventing the twist from entering the fiber supply. This method creates great control over which fibers are drafted. Watch Heavenly’s forward hand (her left) as it shifts the point of twist right or left across the fibers.
Flip It!
Not everyone is comfortable spinning across the top moving from left to right or vice versa. So, Heavenly shows a great trick if you only feel comfortable zigging to the left and never zagging to the right; simply flip the fiber over when you get stranded on one edge. That’s it!
A Chill Fiber Hand
Also check out how relaxed Heavenly’s back hand (her right) is as it holds the fiber. So often, I meet spinners struggling with smooth drafting and consistency that only need to relax their grip on the fiber supply. Heavenly uses her fiber hand to loosely hold the top. That hand also adjusts the angle of the fibers to change which section of top is presented to the fiber. Having trouble getting the left side of the fiber spun evenly? Simply tilt it toward the twist with your fiber hand and move the point of twist to meet it with the forward hand. It takes practice, but this little video is worth a thousand words!
Learn more about how you can start planning, spinning, and plying self-striping yarns that celebrate every hue in your fiber with Heavenly’s fun and beautiful course, Spinning Fractal Yarns.
Kate Larson, editor of Spin Off, teaches handspinning around the country and spends as many hours as life allows in the barn with her beloved flock of Border Leicesters.
Comb a Rainbow of Colorful Wool
Astonished and captivated by all the colorful wool on the market? What if you could create those luscious hues yourself, all without the use of a dye pot?
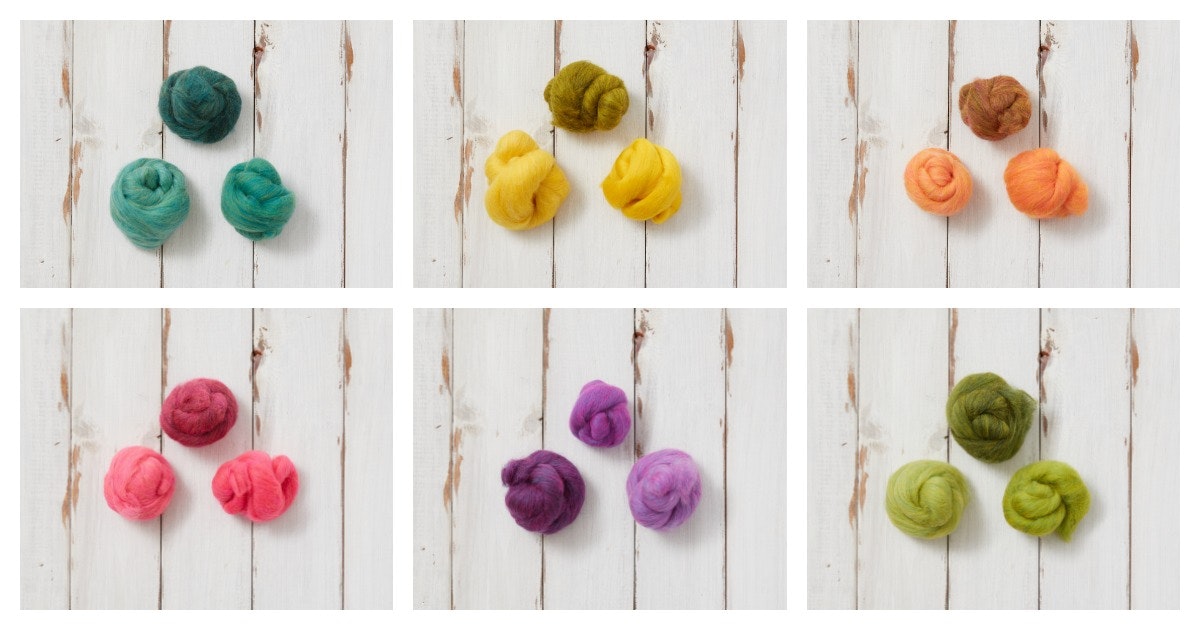
Editor's note: In honor of the official beginning of spring—you know, April showers bring May flowers and all that—we‘ve decided to recognize National Find a Rainbow Day in the United States (yes, that‘s really a thing!). Since rainbows are one of the most beautiful weather phenomena, with vibrant colors that inspire everything from stripey socks to layered unicorn cakes to rainbow twinkle lights adorning the bedrooms of many tweens, we‘ve decided to introduce you to a method of creating a rainbow of hues using hand combs and commercially dyed fiber.
Ever go to a fiber festival or a fiber store and feel absolutely beguiled by the colorful braids of hand-dyed top? What if I told you that you could create those luscious hues yourself, without touching a dye pot? Color Blending for Spinners by fiber artist Esther Rodgers is a great way to learn how to create an entire rainbow with a pair of hand combs and just three colors of commercially dyed wool top.
 It‘s possible to create a full color wheel using just three colors of commercially dyed wool top.
All colors derive from the three primary hues: red, yellow, and blue. Blending red and yellow gives you orange; combining red and blue creates purple; and so on. It’s a lesson we all learned in elementary school with a box of crayons. BUT. The beauty of using hand combs to manually blend fibers is that you will never have a completely blended mix, and it is that slight irregularity that gives richness and depth to your colors.
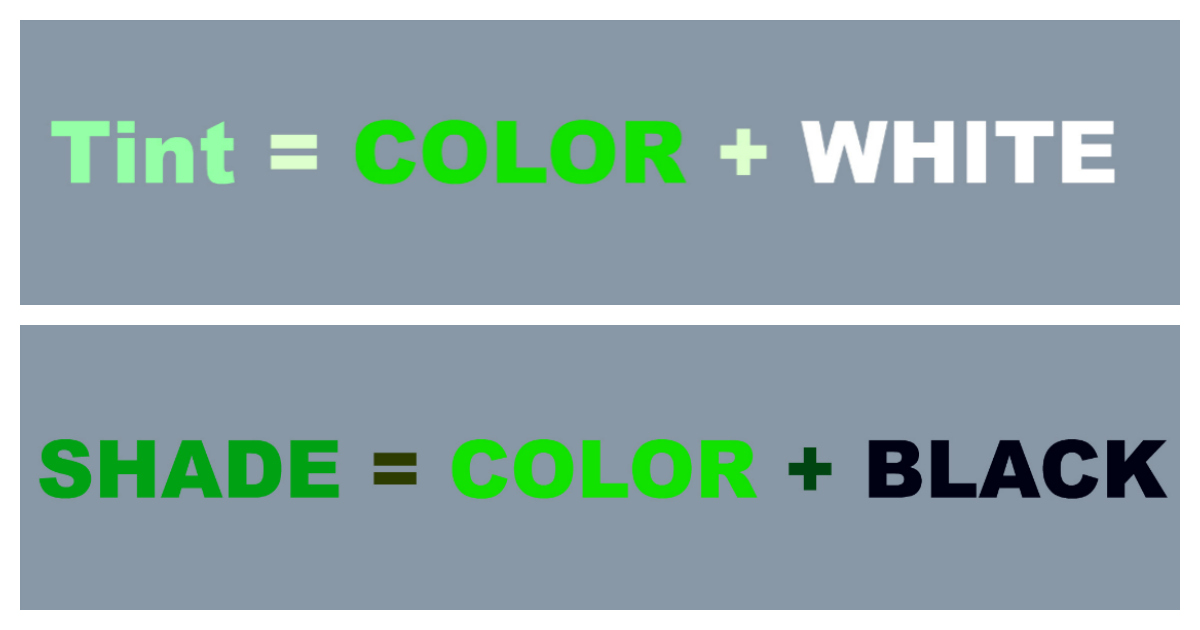
Throw some shade on your fiber.
Things get really fun when you start blending black and white into your mix. (Okay, that’s technically more than three hues, but I’m the sort of person who doesn’t consider salt and pepper “ingredients” when I cook.) Adding white lightens and brightens things into a tint, while adding black tones things down into a shade. Which is to say that hand-combing commercially dyed fiber gives you color options that can go well beyond some of the hand dyes you see.
 Esther Rodgers discusses how to add depth, dimension, and interest to colors you blend yourself using a pair of hand combs and introduces the viewer to color concepts such as hue, value, saturation, tint, and shade.
Color Blending for Spinners is a fantastic streamable course you can watch at your own pace, anywhere, any time, on any device. Follow along with Esther Rodgers as she discusses the differences in commercially dyed top that is one tone vs. hand-dyed top that has far more depth, which adds interest to your fibers, and demonstrates how to expertly blend primary colors to create unique, vibrant colors for yourself.
Never stop learning!
Allison Korleski is a former video producer for Spin Off.
Originally published January 30, 2019; updated April 3, 2023.
Five Good Reasons to Buy and Use Mini Wool Combs
Wool combs may look scary, but once you try them, you’ll be hooked.
By Anne Merrow
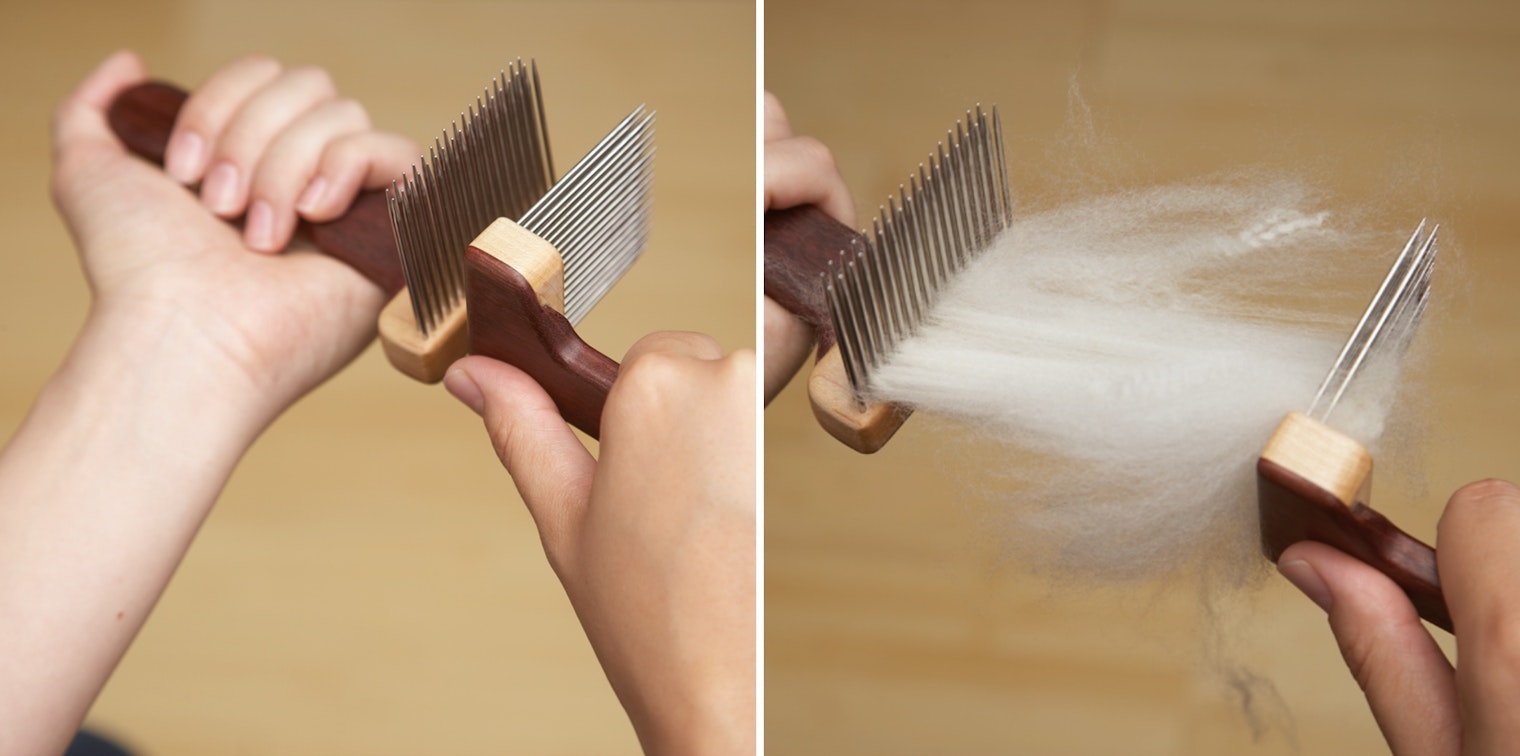
Deciding to buy wool combs can be a big step. They’re not the first piece of equipment any spinner buys, but once you have a pair you’ll wonder how you got by without them. You may picture the full English combs, but the more manageable (and less lethal) mini combs are incredibly versatile. Here are five reasons to add mini wool combs to your spinning tool kit.
1. Chaff and vegetable matter, begone!
Combing removes undesirables such as vegetable matter and deposits them behind the rows of teeth, leaving you with only the prime fiber. If you have an otherwise perfect fleece that has a little extra hay in it, a few passes with combs will take that right out. (Spread a cloth in your lap to catch any veggie matter that falls out.)
2. You love to spin worsted yarns.
Short forward draw is my favorite technique, and it wants to make a smooth worsted yarn. Combing the fibers to make them parallel prepares the fiber for a worsted draw.
3. You like to spin off the beaten path.
There are more prepared fibers available today than ever before, but not every fleece is available as combed top. If you want to comb and spin a greater variety of fibers, at some point you’ll need to prepare them yourself, and some fibers really want to be combed. (Listen to them.)
4. You’re tired of spinning compacted commercial top.
Commercially prepared fiber has a lot going for it, but between when it’s combed and when it’s in your hands ready to spin, it can be squished and rubbed (and dyed and felted) and generally roughed up. It’s also been pressed to subdue the natural crimp. Lively and airy, hand-combed top is delightful to spin—no predrafting or stripping required.
5. You like to make your own fiber blends.
Mini combs are a perfect way to blend colors and textures. Layer different elements and use the combs to create a custom fiber prep.
 Steps in using wool combs
How to Use Combs
- Top left: Lash wool locks onto one comb, anchoring the butt (cut) end behind the tines.
- Top right: Turn the second comb perpendicular to the first and gently run it through the locks. (Always point the combs away from yourself and others.)
- Bottom left: It’s easy to pull off the combed locks for spinning, leaving behind waste.
- Bottom right: Combing two colors or textures of fiber together makes a spectacular custom blend.
But Don’t Buy Mini Combs if . . .
You want to impress your friends. Wielding a pair makes you formidable to spinner and non-spinner alike. Use caution and only use your wool processing powers for good.
Anne Merrow is a cofounder of Long Thread Media.
Originally published October 10, 2019; updated December 5, 2022.