
Loading the latest stories…
There’s more than one way to wind a Turkish spindle cop! Find the right method for you and your spinning style.
Deborah Held4 min read
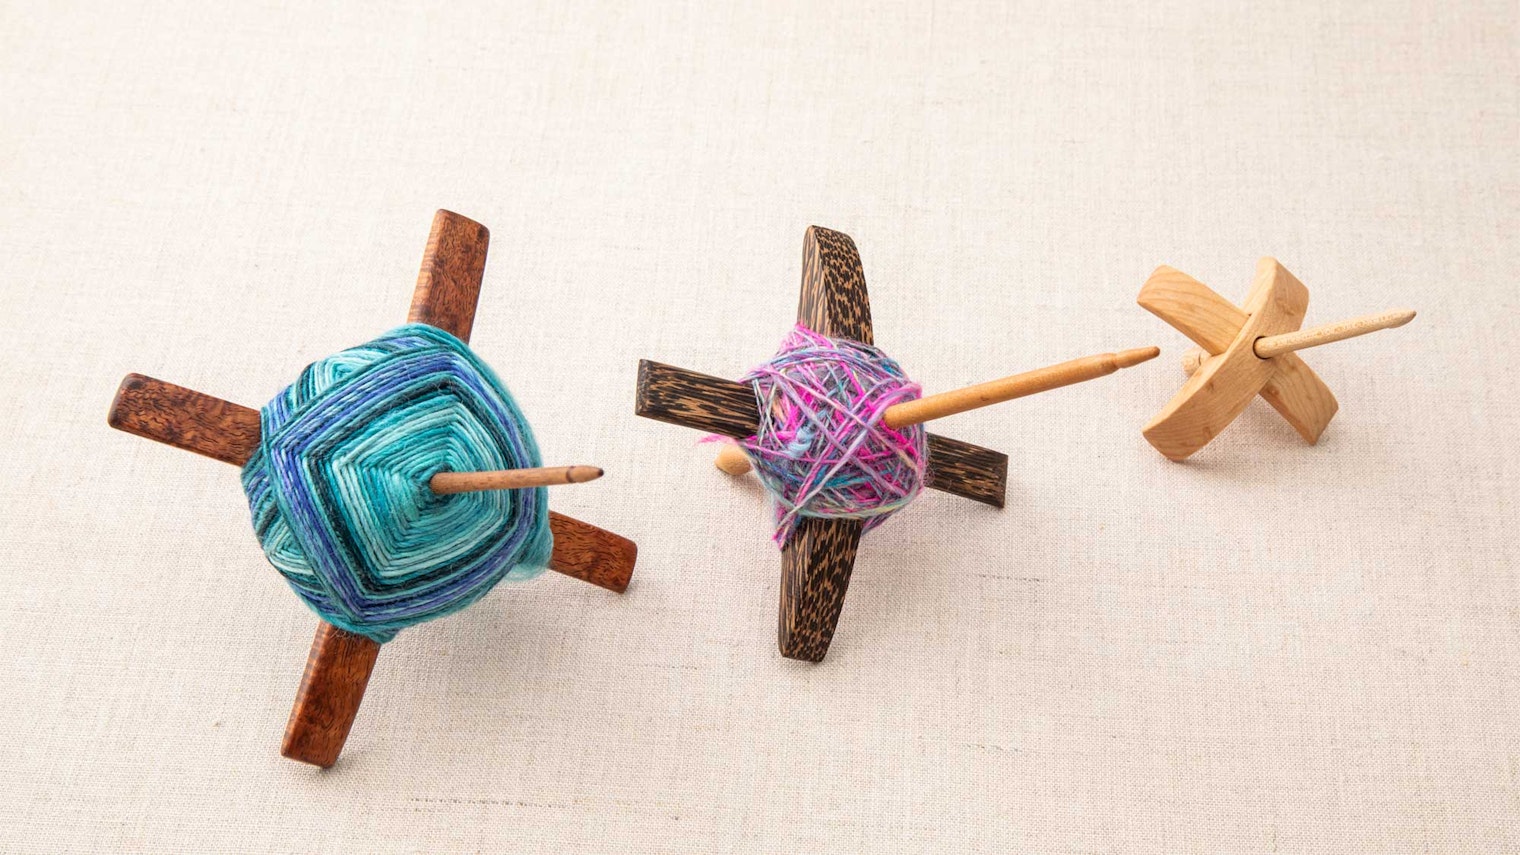
Building a cop on any spindle serves a purpose. As the cop builds, its weight and shaping help to increase the spindle’s speed and spin time, post-flick.
The cross-armed, or Turkish, spindle is extra-special: Its range of potential cop styles—sometimes called turtles due to their shape—make the it a standout for combining form and function.
 What's the best way to wind a Turkish spindle? It depends! Photos by Debbie Held unless otherwise noted
Which wind-on is right for you? First, consider these factors:
The length and shaping of the spindle’s arms dictate how wide or “fat” you can build the cop. Arms with minimal to no curvature provide a longer, more stable foundation for building out the turtle’s base.
Where the arms sit height-wise along the shaft length is another consideration. Some arms rest higher than others, providing added space to fill beneath them.
Even a tiny Turkish spindle can hold a surprising amount of yarn, beating out the standard drop spindle’s capacity. Spinners are known to pack astounding amounts of yarn onto their Turks by utilizing hidden spaces and spinning supported or semi-suspended as the cop builds.
 Your spindle’s dimensions impact the size of the cop you can make.
We all spin for our own reasons and results. Those who love meticulousness and a more worsted spin might enjoy the meditative and decorative aspects of a shiny God’s eye turtle. Spinners who are as eager to work with their yarn as they are to spin it, might choose the super-fast ball, or simply wind on haphazardly; while problem-solvers might enjoy working with a combination of wraps to pack on as much yarn as possible, etc.
I know many Turkish spindle lovers, and we all wind our cops differently. Where one loves to build a tall cop, another spins faster than all the wheel spinners in workshops with the help of a ball wind-on.
These wind-ons work well whether you’re spinning singles or plying them. All choices yield a cop with a terrific center-weighted mass, increasing the speed and length of your spin time.
 Variants and combinations of basketweave, ball, and God’s eye wraps.
This fancy turtle shape appears more complex than it is, and for some spinners, the meditative rhythm of “over two, under one” and the controlled result is as rewarding as the act of spinning.
Step 1. Starting with the yarn at the center point, wrap it over two arms and under one, while slowly rotating the spindle in one direction. Snug the yarn up against the shaft, and continue winding in this pattern until you have your first layer of four perpendicular loops.
Step 2. Continue, nestling your new strand(s) to the outside of the last wrap (instead of the shaft), extending your turtle base down the arms as desired.
Step 3. To build your next layer, repeat Step 1, but note that this layer is offset from the last one.
Step 4. Continue building your turtle.
 Debbie working on a God’s eye wind. Note how each new layer is offset from the last, creating the traditional God’s eye shape.
This is simply a reversed God’s eye, made by winding “over one, under two” (if holding the spindle with its arms right-side up). Used on its own, your turtle will appear upside down with its flat side up. Used along with God’s eye, this adds subtle sloping beneath the crossed arms, making use of space beneath.
Step 1: Wind yarn at a diagonal (just like a forward slash) around two arms, being sure to wrap around the back of the shaft (underneath the arms) each time. Turn the spindle one-quarter and repeat. (Note: Unlike the other wraps, here we layer in place multiple times before turning the spindle.)
Step 2. Be patient. This one looks like any other at the start. So long as you’re including the shaft inside the wrap, your perfect ball will morph as if by magic.
 The reversed God’s eye wind-on makes use of the space below the spindle arms or inside their curve when upturned.
Super-fast to wind and to spin, but also pretty.
Step 1: Wind yarn at a diagonal (just like a forward slash) around two arms, being sure to wrap around the back of the shaft each time. Turn the spindle one-quarter and repeat. (Note: Unlike the other wraps, here we layer in place multiple times before turning the spindle.)
Step 2. Be patient. This one looks like any other at the start. So long as you’re including the shaft inside the wrap, your perfect ball will morph as if by magic.
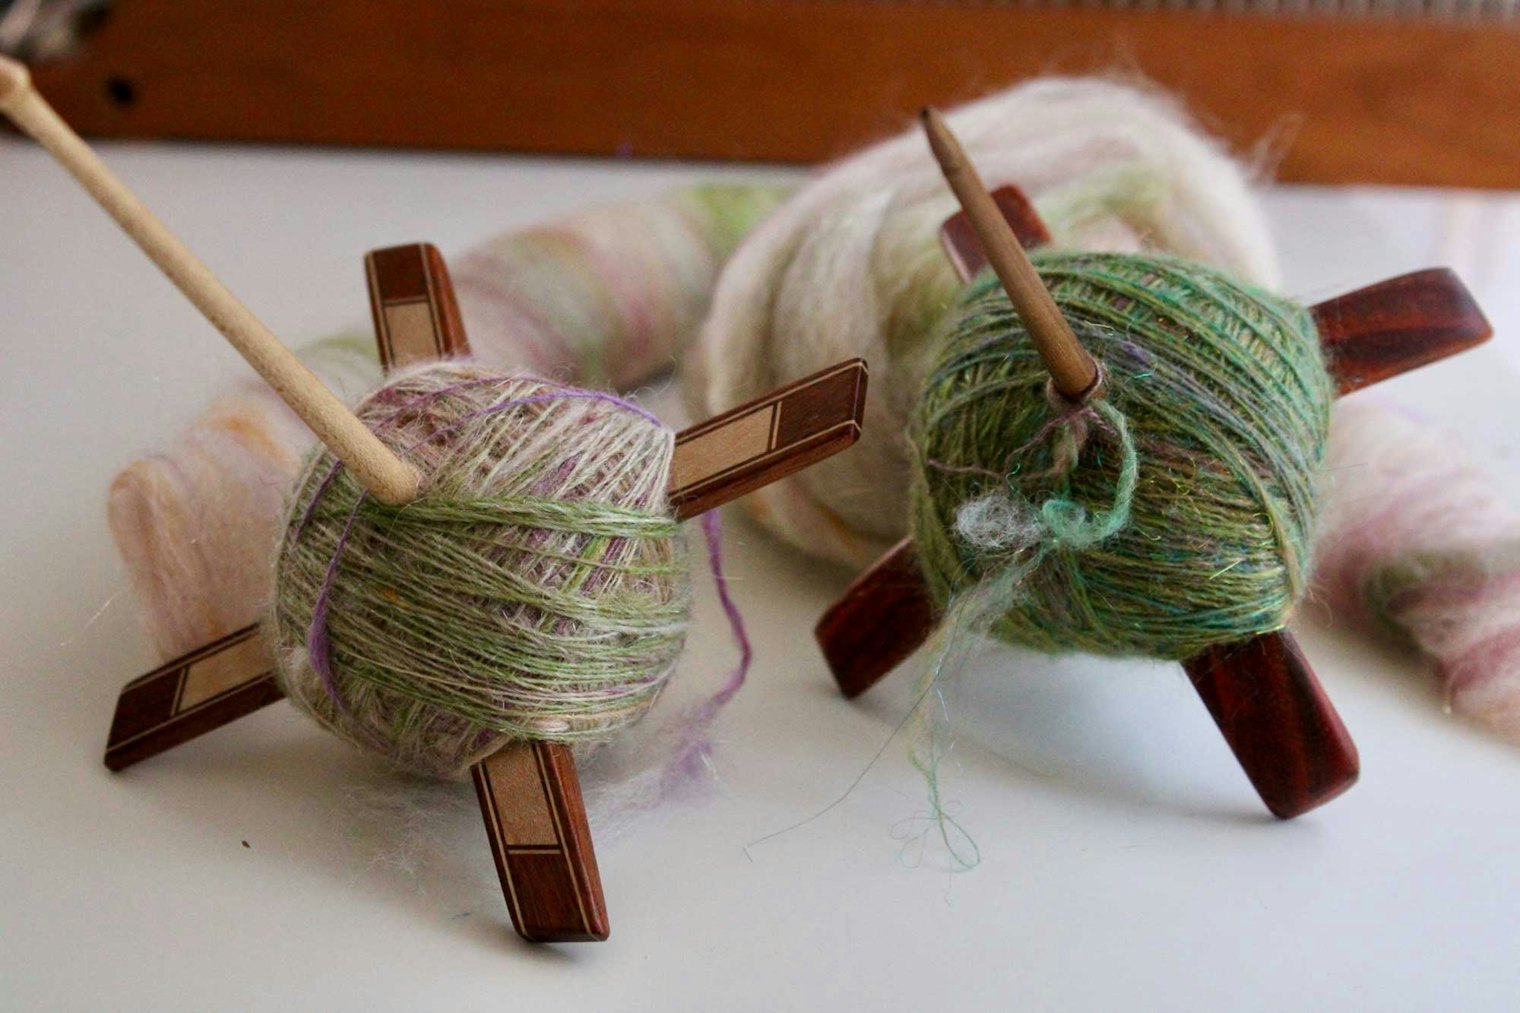
The fast ball-wind allows the spinner to make use of spindle space, especially beneath the arms.
Is a meticulous cop a necessity? No, of course not, but there are good reasons for keeping your yarn tidy while spinning, so why not give one or more of these methods a try?
You may find your spinning more irresistible than ever!
More from Spin Off





Comments
No comments yet — be the first to share your thoughts.
Sign in to join the conversation — commenting is for signed-in members.